
Greetings, brave IT pros. Your mission, should you choose to accept it: jump through a DMZ zone directly into an SSH server. The Team: You and RDM.
OK, I have been watching too much Mission: Impossible lately. But I promise you that this challenge is easily possible, because you can now use RDM to jump through a DMZ (sometimes referred to as a perimeter network or screened subnet) and directly into an SSH server. So let’s get this show on the road!
Configure the Jump Server
- Create a new SSH Tunnel entry in RDM. In the General section, enter the SSH server information for access to the DMZ zone (#1). Then in the Outgoing Tunnel Settings, configure the Mode to Dynamic and the Source to 127.0.0.1 (#2).
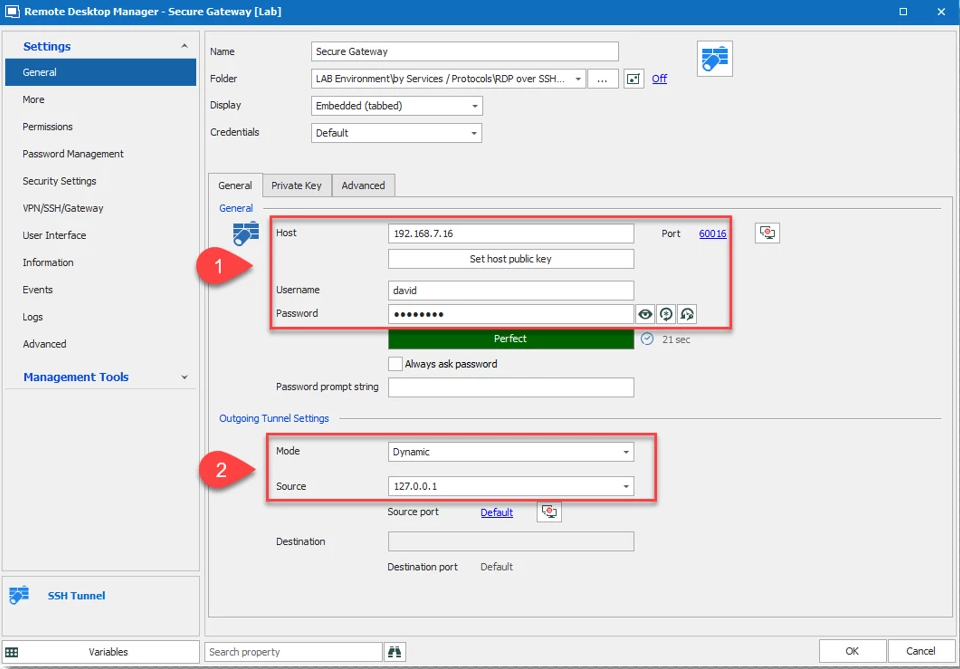
- If you wish to keep your Secure Gateway window hidden, then go to the Advanced tab and check Hide when connection successful.
The Jump server (secure gateway) is now configured and ready to use.
Configure the Target Machine Session
Next, you need to configure the target machine session. RDM supports RDP and web browser over the secure gateway.
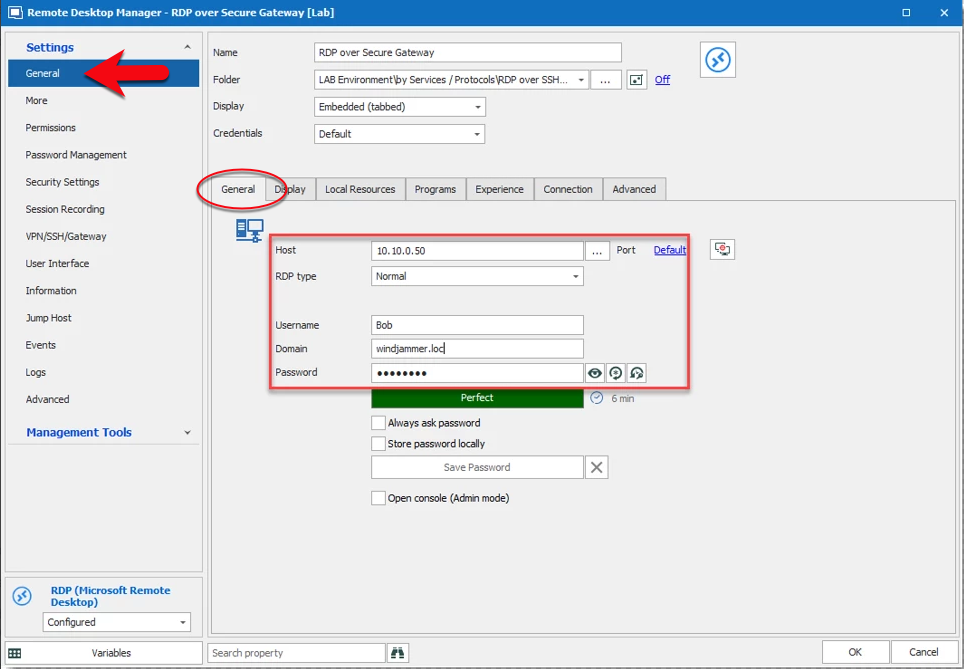
- In the General side menu – under the General tab of your target machine session (in the example below, I’m using an RDP session), configure the Host, Port, Username, Domain and Password (note: forget the old configuration, do not enter a localhost IP 127.0.0.1).
-
Next, click on the VPN/SSH/Gateway (#1) side menu for the Secure Gateway Configuration. Select the Open and Close options (#2) based on your requirements. If you wish, you can also configure the VPN Group (#3) as explained in our Online Help Portal (click here for more information). We strongly recommend configuring a VPN Group if many RDP/Web Browser sessions use the same secure gateway. Lastly, click on the Type (#4) dropdown and select Existing SSH (#5).
-
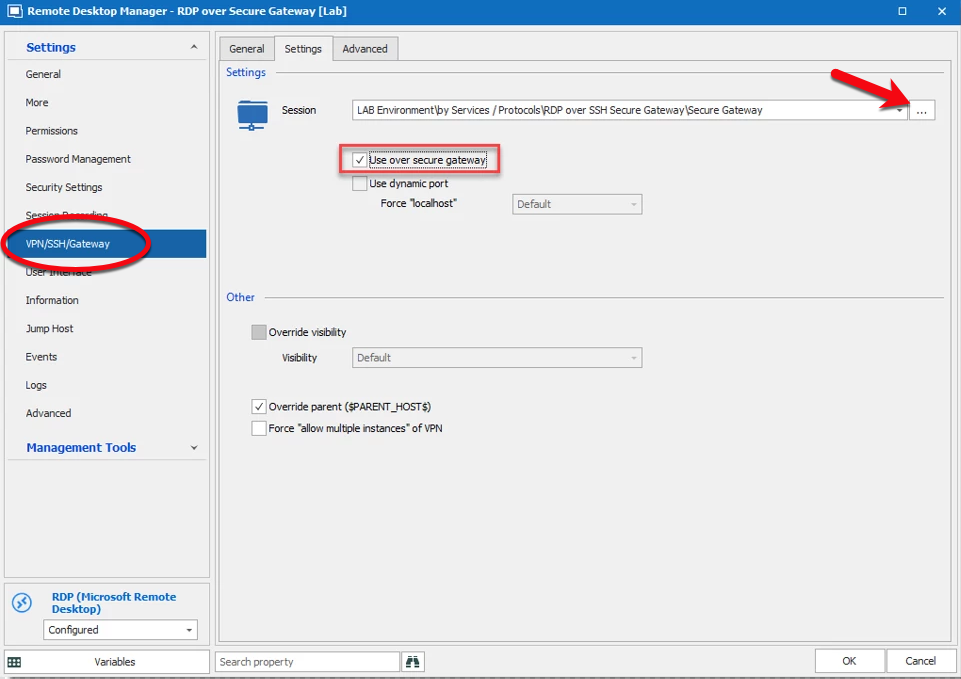
Under the Settings tab, click on the ellipsis next to the Session dropdown menu and select the SSH Secure Gateway that you wish to use. Then check Use over secure gateway.
- By default, the waiting time for the VPN session is set to 1 second. If you wish to change this, click on the Advanced tab and, in the After Execute Wait section, change the delay to the number of seconds you want.
As required, repeat the “Configure the target machine session” steps for each additional session that uses the secure gateway.
Both sessions are now configured, and you’re ready to start the RDP session. Everything else will be performed automatically by RDM.
And now you can proudly say: Mission Accomplished!