You know how frustrating it is when another user disconnects you from a server? Sure, it’s not personal — but it’s still annoying. Well, that suffering is over thanks to the new Check Out feature, which will be available in Remote Desktop Manager 13 (coming soon!).
About Check Out/Check In
Check Out lets you lock an entry while using it, so that other users can’t access it and disconnect you from a server. When you’re done, you simply unlock the entry (i.e. you “check in”). It’s fast, easy and will save you plenty of aggravation.
Multiple Entry Types
You can enable Check Out for several types of entries, such as sessions, documents, credentials, and information entries, while using a Microsoft SQL Server or Devolutions Server data source.
How to Set Up Check Out
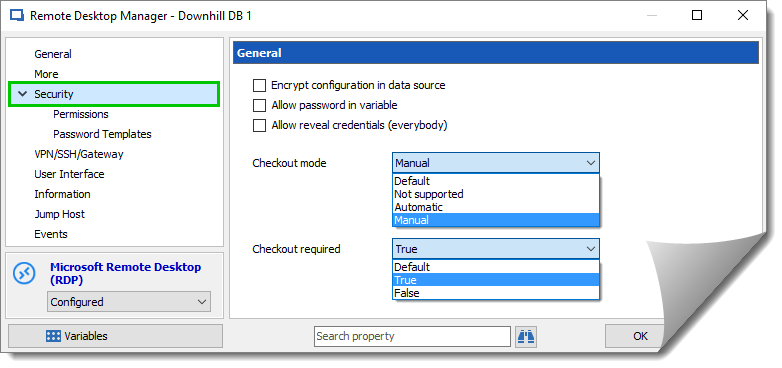
- Start by editing an entry
- Navigate to the security section
- Choose your preferred checkout mode (it can be manual or automatic)
- Choose whether checkout is required
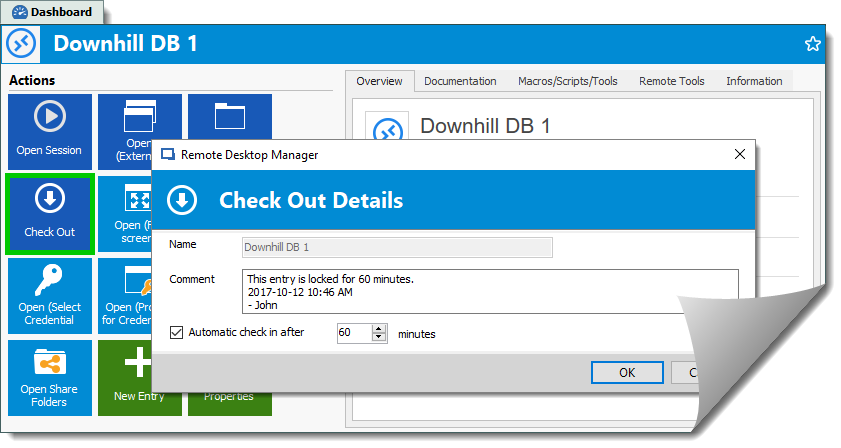
Then, whenever you wish to lock the entry:
- Click the Check Out button on the Dashboard
- Enter a brief comment, which will be displayed in the entry log
Check Out for Multiple Entries
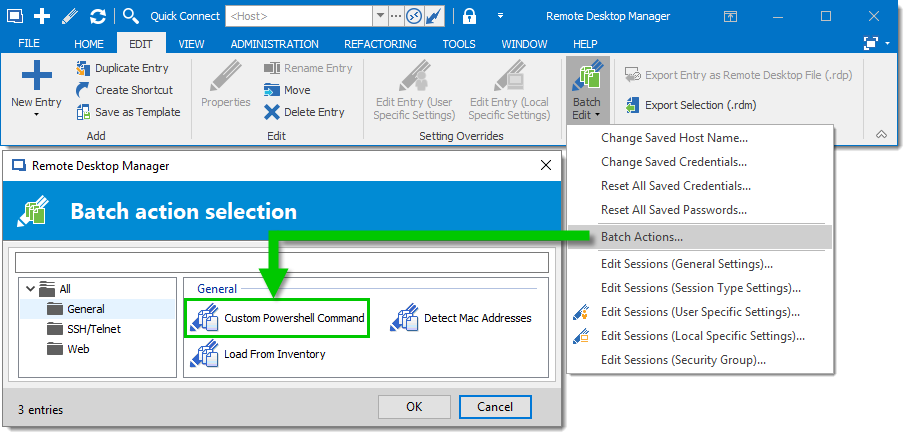
With the latest beta of RDM, you can already enable the Check Out feature for single entries. But applying it to dozens or hundreds of entries one by one is time consuming. To speed things up, you can use the Batch Action feature and create a simple PowerShell batch action. Here’s what to do:
- Select the desired entries (our Advanced Search tool is useful to select specific entries)
- Click the Custom Powershell Command Batch Action from the Batch Edit menu
- To enable Check Out mode, paste the following line of code in the script: $connection.Security.CheckOutMode = "Manual"; The possible values are Default, which refers to the setting in the Root settings, NotSupported, Automatic and Manual
- To make the Check Out required before an entry is used, add the following line in the script: $connection.Security.RequireCheckOutMode = "True"; The possible values are Default, which refers to the setting in the Root settings, True, and False
- Finally, save the changes by adding the following line at the end of the script: $RDM.Save();
Tell Us What You Think
We hope that Check Out helps you save time, effort and stress! If you want more information about the Check out feature, you can always consult our Online Help. As always, please let us know your thoughts by commenting below. You can also visit our forum to get help and submit feature requests.