
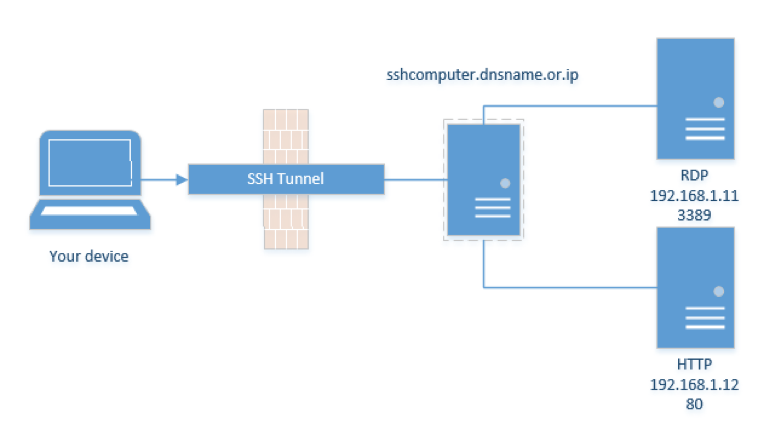
Most of you have probably used a tunnel with an SSH connection. What you probably weren’t aware of is that you can use a dynamic tunnel to access all remote infrastructure. Furthermore, you can specify a port and a destination IP to have direct access. This process is achieved through your PuTTY configuration.
In this procedure, we will use Internet Explorer, Firefox and an RDP connection to demonstrate the use of a tunnel with an SSH connection, as well as configuring the tunnel with several other protocol types.
Local Port Forwarding
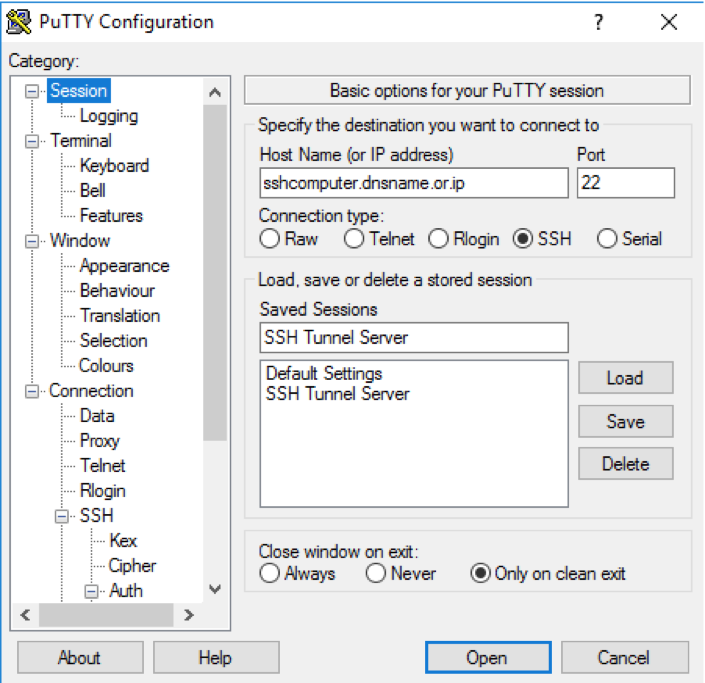
Step 1 – Load the Session
In your PuTTY configuration, configure the Host Name and Port of your remote SSH computer. Enter your Saved Sessions name, and click Save. If your session already exists, **Load **it as shown below:
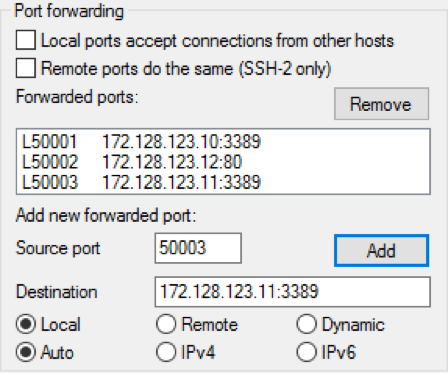
Step 2 – Configure PuTTY for RDP In the Tunnels section in PuTTY, configure a specific** Local** port, such as 50001, that will redirect to 3389 of your destination server.
In the Source Port field, enter the local port that will be redirected.
In the Destination field, enter the IP address as well as the destination port.
Select Local and Auto to activate IPv4 and IPv6.
Here is an example from my local machine I would like to go to 172.128.123.10, server port 3389.
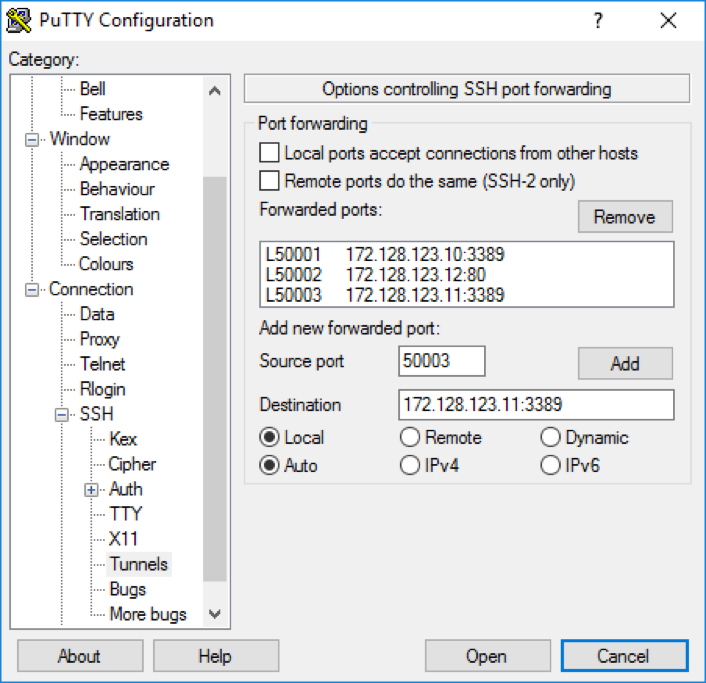
Please note that you may configure your ports for multiple servers simultaneously. Configuring a specific** Local** port such as **50002 **will redirect to 80 of your destination server. Doing so will allow you to configure PuTTY to your web browser.
Once the configuration setup is complete, open an RDP connection and enter your local IP (127.0.0.1), along with the local port configuration in PuTTY.
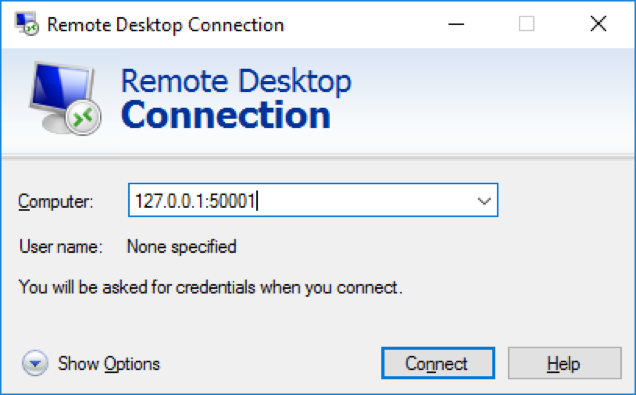
As illustrated above, if I enter 127.0.0.1:50001, my connection will translate to the server 172.128.123.10:3389.
If I enter 127.0.0.1:50003, my connection will translate to the server 172.128.123.11:3389. Step 3 – Configure the SSH Tunnel In the Category menu, drill down to Connection --> SSH --> Tunnels. There are several ways to configure a Tunnel. We shall proceed with a browser tunnel configuration.
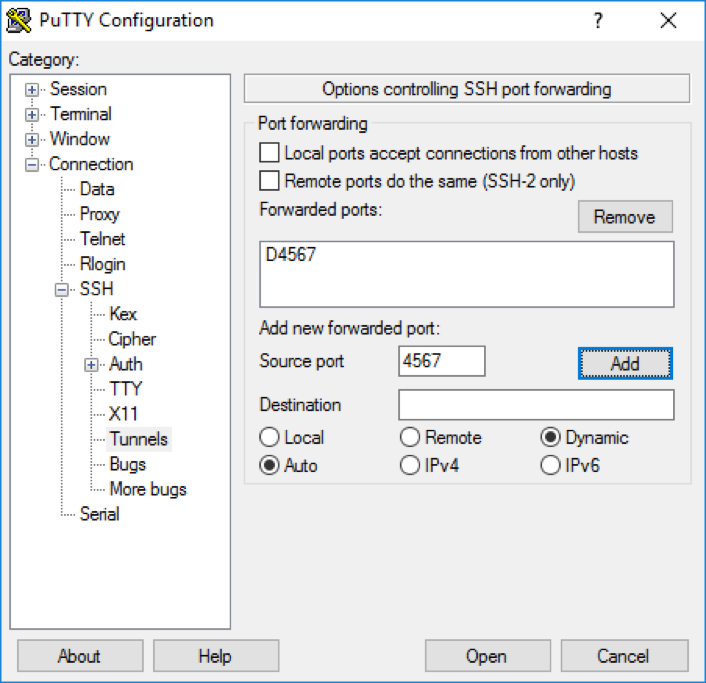
Advanced Scenario (Dynamic Port Forwarding)
Step 4 – Configure PuTTY for a Web Browser Tunnel. At the Tunnels page, configure a Dynamic port between the ranges of 49152-65535. For additional information, refer to https://en.wikipedia.org/wiki/List_of_TCP_and_UDP_port_numbers 49152–65535.
Step 5 – Configure Your Software Further information for Internet Explorer, Chrome or Edge can be seen in Step 5.1. For Firefox, refer to Step 5.2, and for RDP usage, refer to Step 2. Step 5.1 – Configure Internet Explorer to Pass Through an SSH Tunnel As previously noted, configuring a tunnel through Internet Explorer will affect Google Chrome and Microsoft Edge.
Click on Internet options by navigating through your **Control Panel in your Internet Explorer **browser.

The following illustration displays the Control Panel Home.

Select the Connections tab and click on LAN settings.
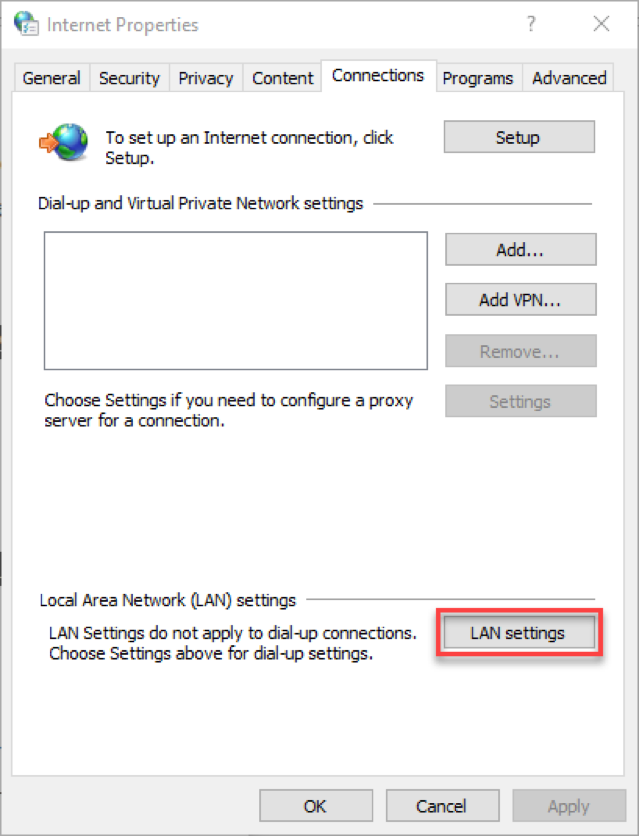
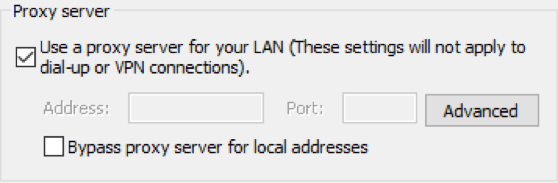
Check the **Use a proxy server for your LAN **box, and click Advanced.
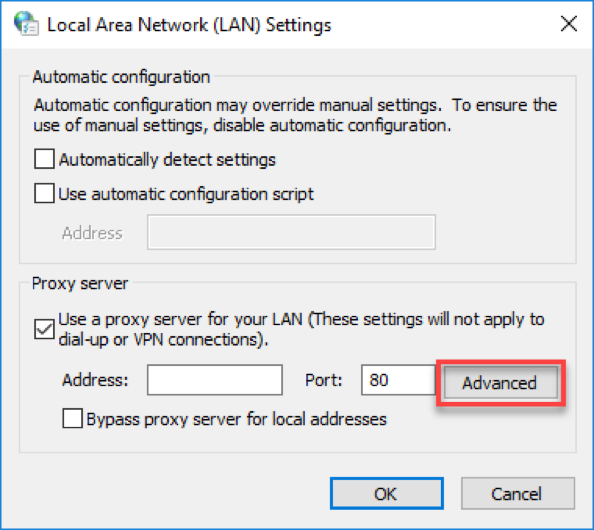
Enter 127.0.0.1 of the host IP in the Socks field, with the configured Port of 4567, and click OK.
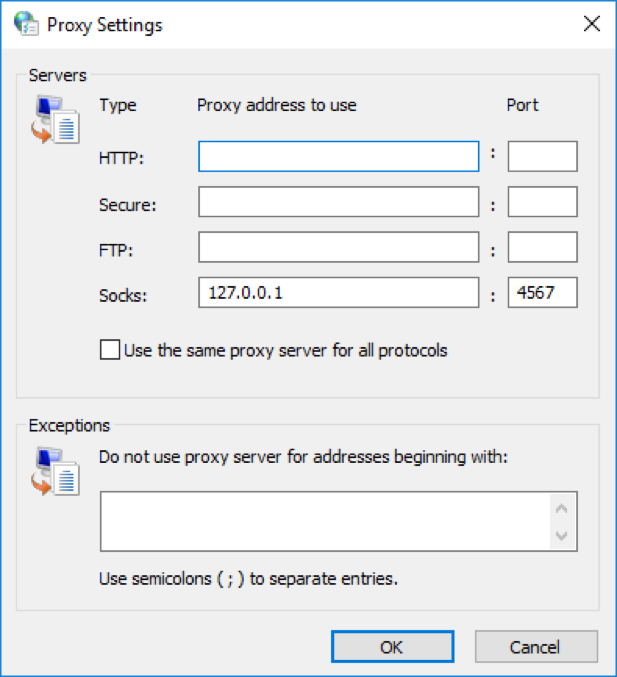
You should see a grey **Address **bar. If your remote segment IP differs from internal segment, please check the **Bypass proxy server for local addresses **box.
Once complete, you will be able to access Internet Explorer, Edge or Chrome to navigate onto an IIS server by entering the IP in your navigator. You may open a browser tab and visit http://172.128.123.10 in this example. Doing so will allow you to view the service from the Destination server.
Your configuration should look like the following figure.
Step 5.2 - Configure your Firefox Browser
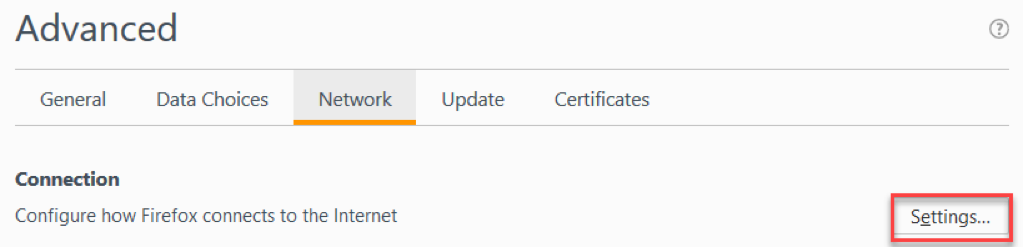
In your Firefox browser, click on the **Menu **button in the top-right corner of the screen, and select **Options. **Then, navigate to the Advanced tab.

Within the **Advanced **tab, select the Network tab and click on Settings in the Connection section.
Once complete, you will be able to access Internet Explorer, Edge or Chrome to navigate onto an IIS server, by entering the IP in your navigator. You may open a browser tab and visit http://172.128.123.10 in this example. Doing so will allow you to view the service from the Destination server.