| The web browser has been deprecated in favor of Devolutions Web Login. Please visit this blog to learn more about this feature. |
|---|
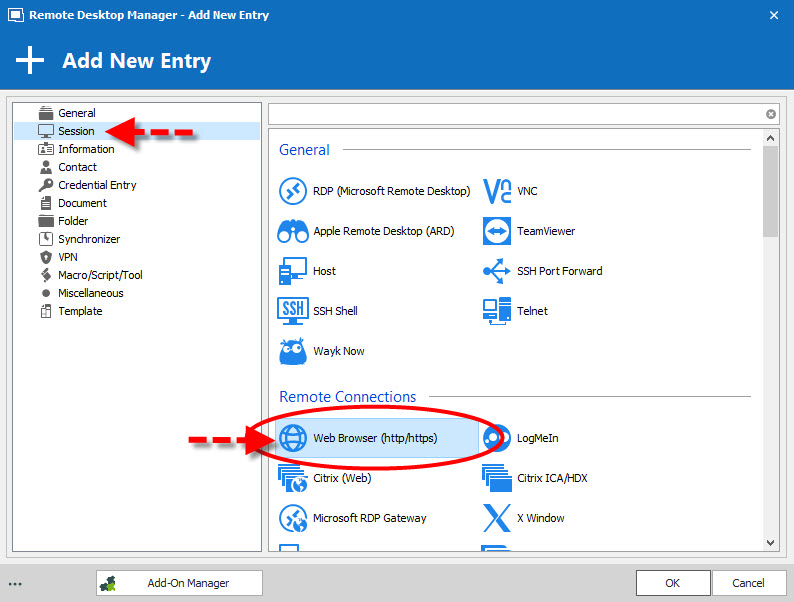
Last week, we looked at the new Devolutions Web Login option. Today, I want to take a deeper look at another way to save time and effort: configuring a Web Browser (http/https) session to automatically log into the website of your choice.
We’ll start by taking a quick look at the available Web Browser session options (Display Mode and Tabs), and then cover how to easily configure the auto login settings.
Display Mode
RDM’s display settings play an important role in how the tabs are laid out, and the mode in which browsers are launched: embedded, external and undocked. Note that the browser’s availability will depend on your display mode.
-
Embedded mode opens the browser window that is docked within the Remote Desktop Manager tab. This mode is available with Internet Explorer, Google Chrome and Firefox.
-
External mode requires the browser extension to interact with Remote Desktop Manager. It allows you to view the web page outside of Remote Desktop Manager. It also offers the user a level of comfort by accessing the web page as if the user were browsing outside of the software.
-
Undocked mode is similar to the embedded mode, but instead of being displayed in a tab, the web page appears in its own floating window. It provides you the freedom to move the web page anywhere, just like a second screen.
Tabs Options
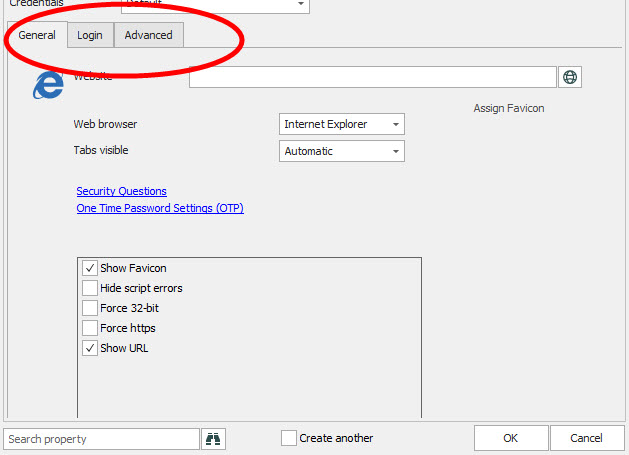
The General tab lets you customize the URL that appears when launching a web browser session. It also allows you to select the browser of your choice. Remember that your options will differ depending on the display mode that has been selected.
Tabs Options
The General tab lets you customize the URL that appears when launching a web browser session. It also allows you to select the browser of your choice. Remember that your options will differ depending on the display mode that has been selected.
The Login tab features three authentication modes: Form, Basic and NTLM. In 95% of the cases the Form authentication will be your best option as it will identify the authentication page containing controls that authorize credential entry. The **Login **tab includes an Autofill login and Autosubmit option. As you can guess, enabling the Autofill option facilitates the creation of automated credentials.
The Advanced tab features the Enable web browser extension link and the Automatic refresh.
How to Configure Auto Login
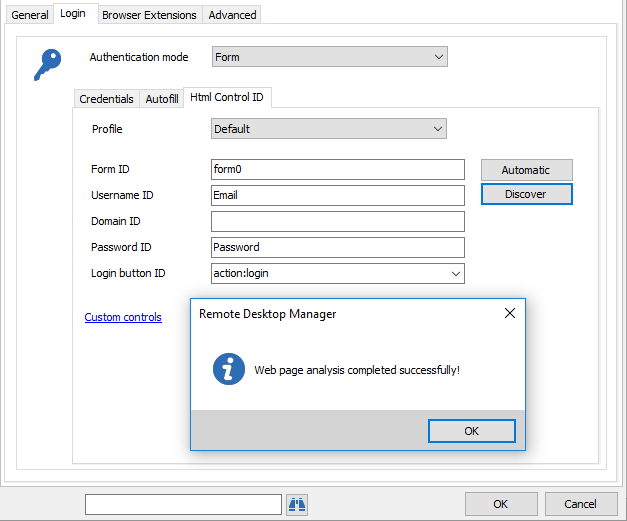
To facilitate the use of the Automatic login, we will use the Form authentication to enable the Autofill and the Html Control ID tabs. In your Web session – General tab – enter your web browser URL. Then in the Login tab, click on the Authentication mode drop-down menu and select Form. Next, in the Credentials tab, enter your username and password.
In the Html Control ID tab, you’ll notice two options: Automatic and Discover.
-
Automatic - inserts the user name and password, but will not run a Discover in the web page. Since the automatic option will not work every time, we suggest using the Discover.
-
Discover - runs directly on the web page, locates the fields corresponding to those in the form, and automatically fills them in when connecting to your web page. It’s a simple and streamlined process.
Click on Discover. Once the process is complete, you’ll see a pop-up message that confirms that everything was successful. You’ll also see that your fields have been automatically filled in.

And that’s it! You can now launch your session, and automatically log in with a simple click directly from Remote Desktop Manager. Enjoy!
If you are experiencing issues automatically logging into the website after following these steps, we would advise trying the Automatic option instead of the Discover option. If the Automatic option doesn't fix the problem, we recommend contacting a member of our Support team, who will be happy to help you.
As always, please let us know your thoughts by using the comment feature of the blog. You can also visit our forums to get help and submit feature requests, you can find them here.