
How does one reach a remote server that is in a protected zone? Maybe there is a firewall protecting the server, but you simply must access that precious server. Naturally, exposing the whole server to the internet is simply too risky. In comes the SSH Tunnel to save the day.
There are many guides out there that use plain SSH commands on *nix systems, but let’s help our Windows users and examine a tool that is readily available to anyone. We will use Putty to achieve our goals.
There are three types of SSH Tunnels:
- Local
- Remote
- Dynamic
This post will focus on Local.
Local Port Forwarding
In this procedure, we will demonstrate two different protocols being tunneled to remote servers:
- RDP to manage a protected server
- HTTP to reach a protected website
This diagram illustrates the main components that are involved. To minimize the surface area that is subject to potential attacks, ONLY A SINGLE PORT is allowed through the firewall. By default, SSH uses port 22, but since it’s well-known and subject to casual scans, it would add a level of complexity if you used another port. For simplicity sake, we’ll use the default ports in this procedure.
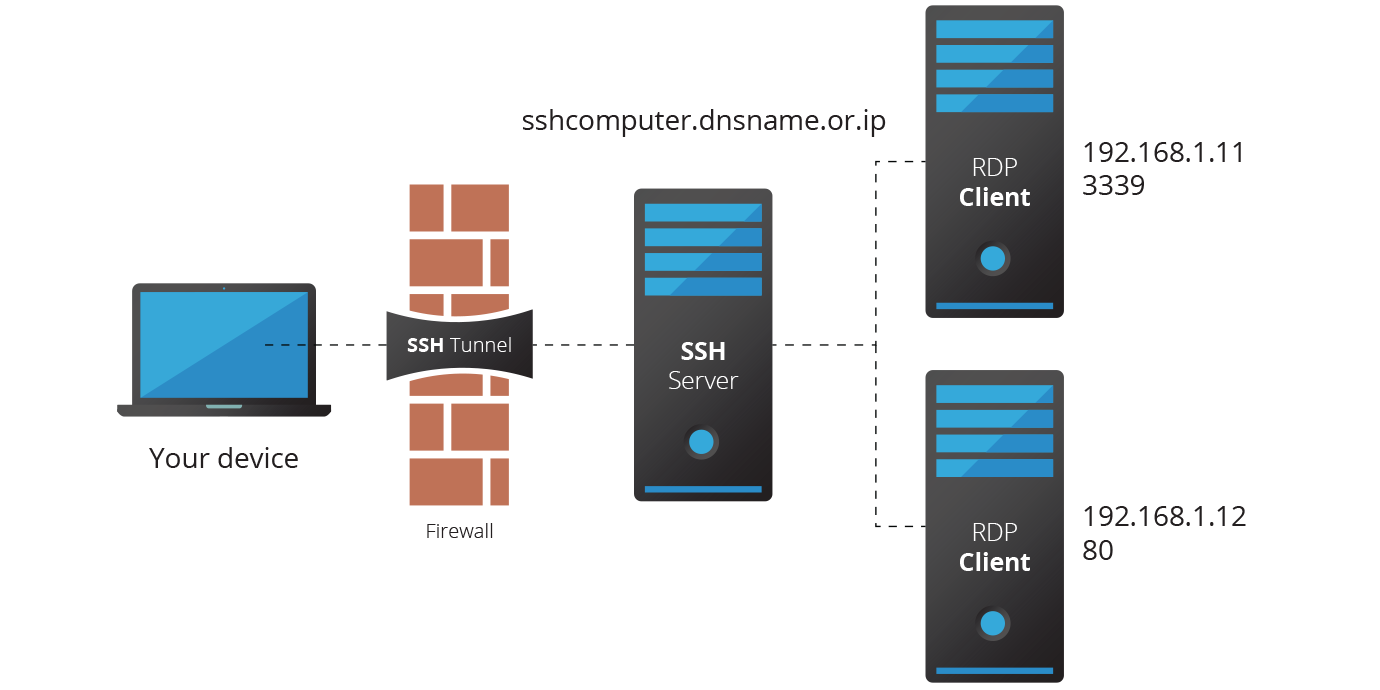
Here’s what we need to achieve:
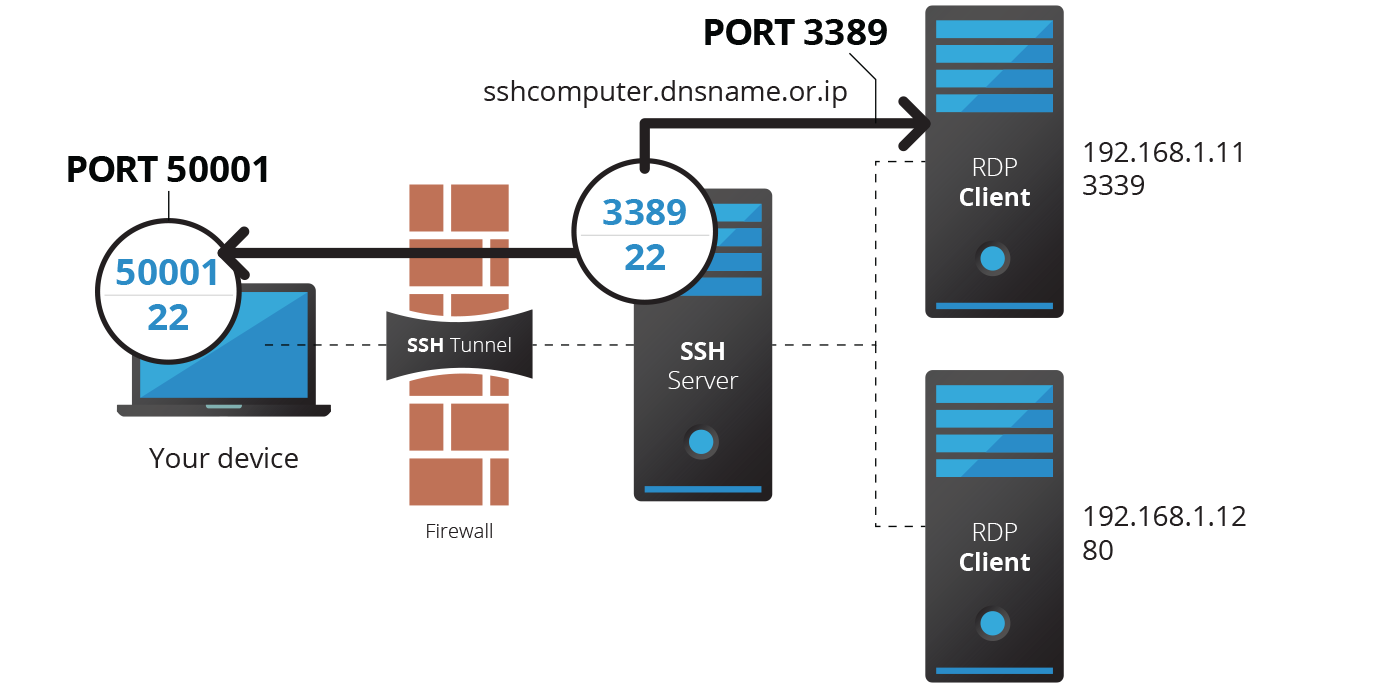
The line is a good representation of the SSH tunnel – a port is opened on your local host, and whatever you send to that port goes to the SSH Server, which forwards it to the remote host, on whichever port you specify.
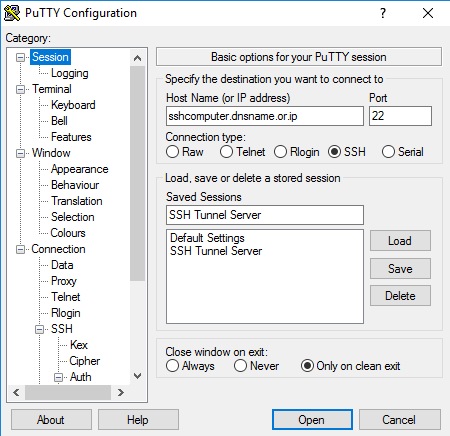
Step 1 – Specify SSH server details in Putty
In your Putty configuration, configure your Host Name and Port of the SSH server. Enter a name in** Saved Sessions**, and click Save.
Step 2 — Configure a tunnel for RDP
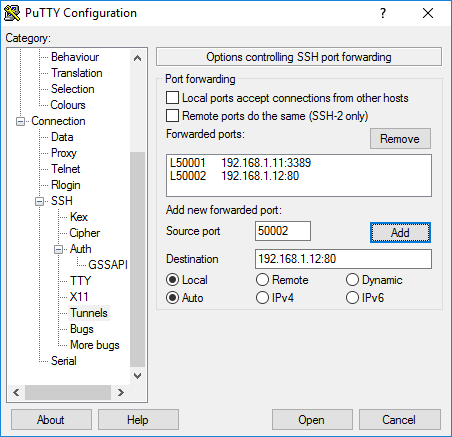
In the Tunnels section (Connection – SSH – Tunnels), configure a specific Source Port to be used as the local end of your tunnel. We have elected to use 50001 because it’s in the Ephemeral port range — i.e. a port that is not officially reserved for any other services. For more information on ephemeral ports, click here.
In the Destination field, enter the IP address of the remote server, followed by a colon, then the destination port. This is an address that the SSH Server must be able to reach. Since we are behind the firewall, it is from its own local subnet.
Select Local to create a Local SSH Tunnel. Select Add to save your tunnel settings. Finally, return to the root (Sessions) to save your session again.
Here is an example of managing the 192.168.1.11 server using port 3389.

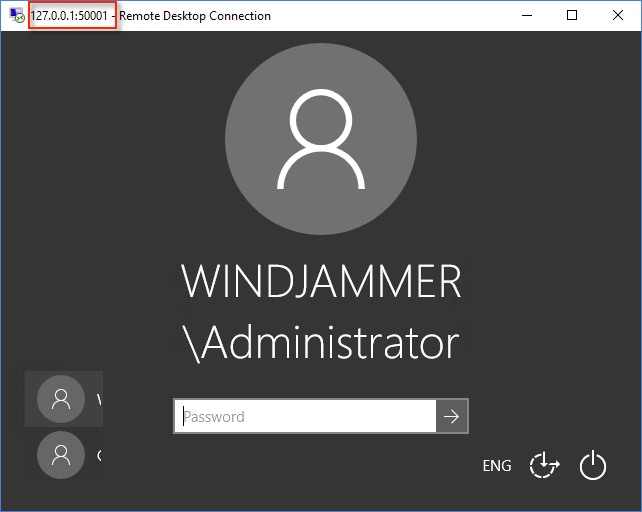
Once the configuration setup is complete and the Putty session is up and running, open an RDP connection and enter your local IP (127.0.0.1), along with the Local port that you have specified in Putty — 50001 in this case.
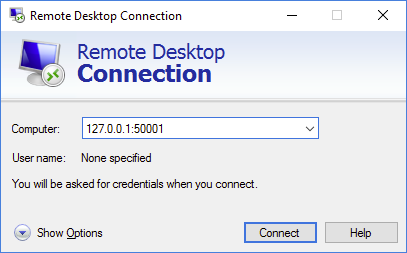
As demonstrated above, by entering** 127.0.0.1:50001** in mstsc.exe, the connection is redirected to 192.168.1.11:3389
Step 3 — Configure a tunnel for HTTP
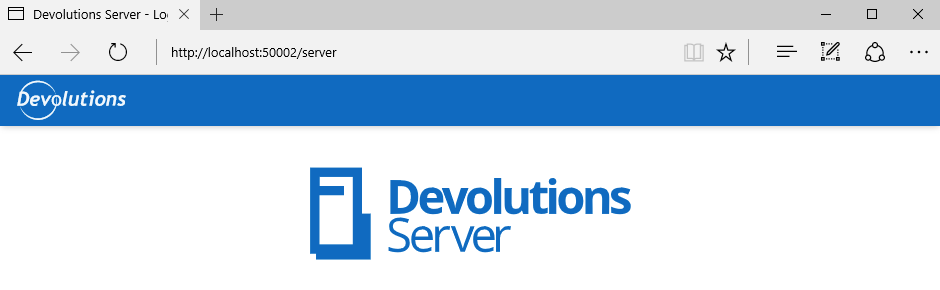
We will make use of the fact that you may configure multiple tunnels simultaneously. This time we’ll configure Local port 50002 to redirect to 80 of the destination server (192.168.1.12 in this case). Just close your tunnel and load the session again in Putty.
Select Add, and then save your session.
To launch it, open your browser and set Localhost: 50002 as the server name. It will reach the remote host transparently.
Remember that both tunnels open as soon as your Putty session is running, enabling you to use them simultaneously.
In part 2, we’ll have a look at Dynamic SSH Tunnels.