Since most of my blogs are about the Windows version of our products, you may be surprised to learn that I’m actually a devoted Apple fan! I have a MacBook, an iPhone, an iPad, and I even eat an apple a day.
And so, I thought I would prove my Apple fangirl credentials by looking at how to configure 1Password in Remote Desktop Manager Enterprise Edition for Mac. Here are the simple steps:
Create your 1Password Entry
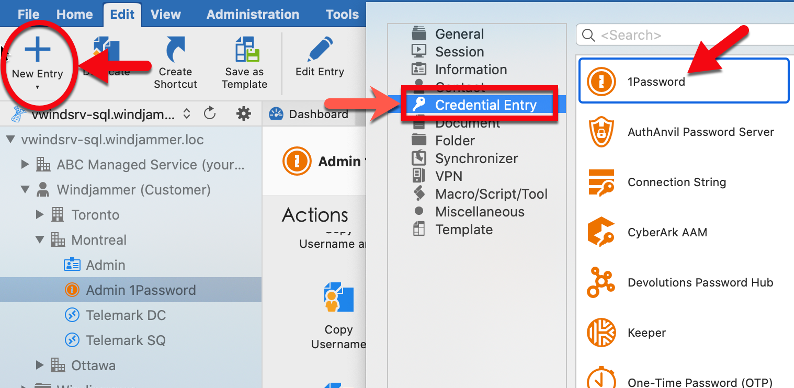
- In Remote Desktop Manager, click New Entry – Credential Entry – 1Password.

-
In the General side menu, enter a name for your entry.
-
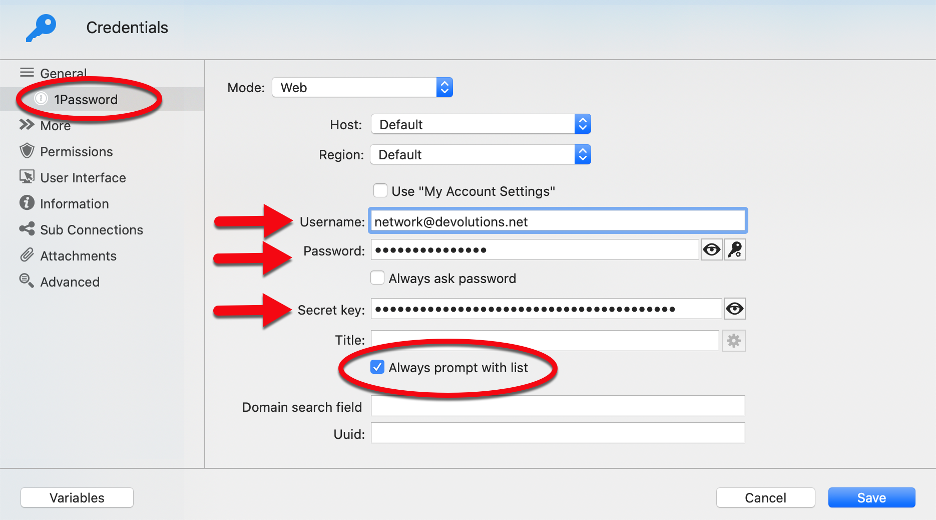
Click on the 1Password side menu and add your 1Password Username, Password and Secret Key. You can also enable the option Always prompt with list if you wish to be prompted with your 1Password list of credentials when connecting. Then click Save.
Link Your 1Password Credential Entry to a Session
- Create or Edit your session. Click on the Credentials dropdown menu and select Credential Repository. In the menu next to it, click on the dropdown menu and select your newly created 1Password entry.

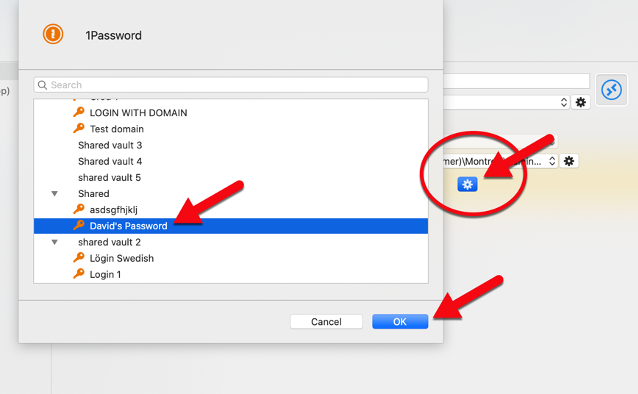
- Click on the wheel under your entry. You’ll be prompted with your 1Password credential list. Select the credential you want to link to your session, and then click OK.
And that’s it. Ah, the joy that is 1Password and RDM working together on a MacBook. It’s like beautiful, geeky poetry!
As always, please let us know your thoughts by using the comment feature of the blog. You can also visit our forums to get help and submit feature requests, you can find them here.

