
Imagine that you have no internet access — perhaps you’re working in a remote location, your ISP goes down, or you’re in an environment with sporadic network availability — and you need to access your data source RIGHT AWAY. Well, you don’t have to face the wrath of your boss, customers or colleagues, or dread the thought of working hours and hours of overtime once internet access is restored. Instead, you can simply connect to a local copy of your data source thanks to Remote Desktop Manager’s convenient Offline Mode!
Enabling Offline Mode
Enabling the Offline Mode is as simple as it is easy. But just like putting together a LEGO Star Wars starfighter, you need to follow the instructions. There are three steps to follow since you need to grant permissions on three different levels: System, Vault and User.
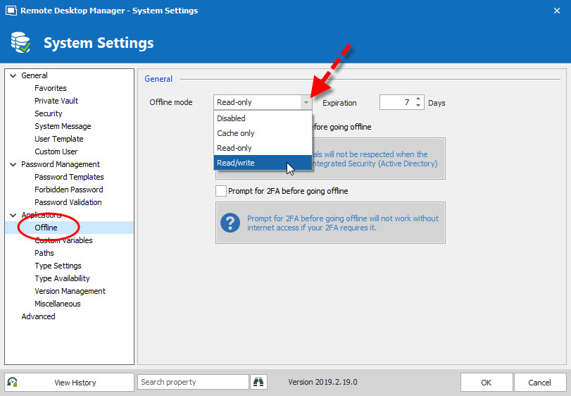
Step 1 – System Setting
- Go to Administration > System Settings.
- Click the Offline side menu.
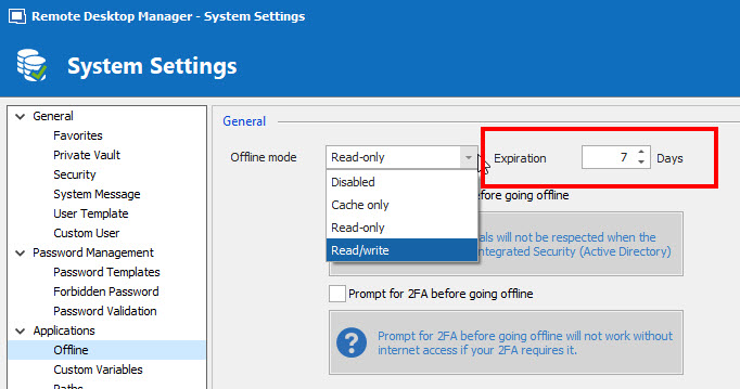
- Click the Offline mode dropdown menu, and select the level of permission that you want to grant to your data source. Here are your options:
- Disabled – This prevents an offline cache from being used.
- Cache only – This allows a user to get the information directly from the local disk.
- Read-only – This allows a user to browse and launch sessions.
- Read/Write – This allows a user to add, update and delete sessions.
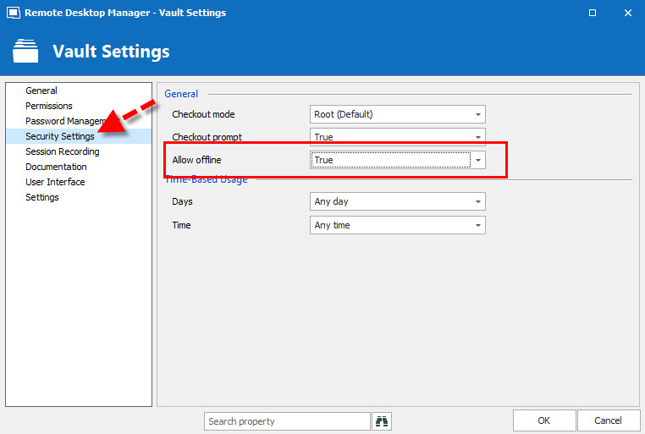
Step 2 – Vault Setting
- Go to Administration > Vault Settings.
- Click on the Security Settings side menu.
- Set the Allow offline to True.
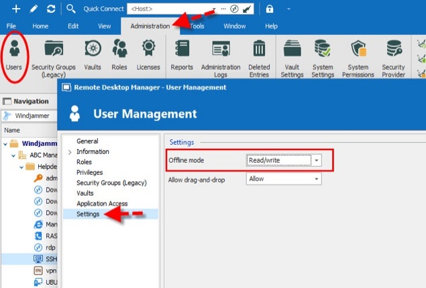
Step 3 – User Setting
The offline mode allows for a granular control since you can choose which users have the right to access the data source when they work offline.
- Go to Administration > Users.
- Select the user and click Edit.
- Click the Settings side menu and set the Offline Mode permission level.
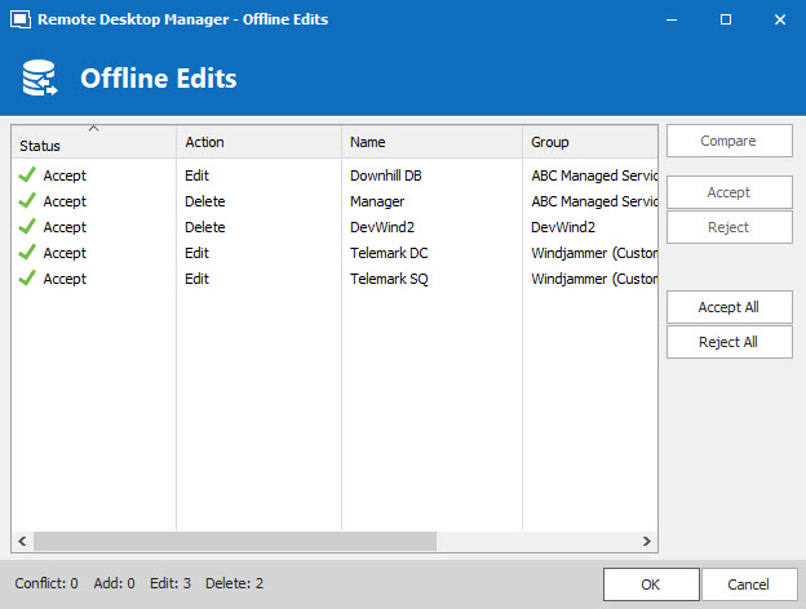
Connecting Back to the Data Source
So, let’s say after performing the three steps above you’ve been busy working in Offline Mode. Then, you return to the office. What about the changes you made to the data source? Don’t worry: all of the changes can be automatically saved locally and synced back to the data source when it becomes available again. Here is how to do this:
- Go to File > Go Online. This will display the Offline Edits window.
- Select the changes you wish to Accept and those you wish to Reject. You can also use the Compare action for a side-by-side comparison of your offline changes vs. the current live entries.
Security
At this point, you might be excited about working in Offline Mode, but wondering if it’s secure. The answer is yes! Offline files are encrypted using our own private key, which is then mixed with some unique information taken from your local machine. This makes it impossible for a copy to be readable on another machine. On top of this, you can add your own passphrase.
Please also keep in mind that for added security, offline files are set to expire after a certain time period. The default duration is 7 days. However, you can adjust this by going to Administration > System Settings and changing the number in Expiration to whatever you wish.
And that’s it! You’re now a Jedi Master of Remote Desktop Manager’s Offline Mode. You can work from anywhere with or without internet access — even if you’re on the Millennium Falcon!