It’s back to school time, and those beautiful lazy summer days are already a thing of the past. Instead of waking up to the sounds of kids watching cartoons on TV, parents are dealing with stressful mornings, making lunches, trying to get to the bus stop on time…
Well, kids aren’t the only ones doing some learning. Here at Devolutions University, school is also back in session! Today, we’re going to take a closer look at using Vaults in Remote Desktop Manager.
About Vaults
Vaults in RDM divide a data source into multiple compartments. We recommend using Vaults to improve organization and security throughout the organization. In addition, Vaults improve performance and speed, since they limit the number of entries that load simultaneously. They also simplify user management (more on this below).
Currently, vaults work with several Advanced Data Sources, including:
- Devolutions Password Server
- MariaDB
- MySQL
- Microsoft SQL Azure
- Microsoft SQL Server (MSSQL)
Now, you might be thinking: “Wait a minute. This sounds familiar — isn’t a Vault the same thing as a Repository?” The answer is yes (you get a gold star on the test!). Before the release of Remote Desktop Manager 2019.1, Vaults were indeed called Repositories.
How to Create a Vault
We recommend creating a different Vault for each customer or department. Here are the steps:
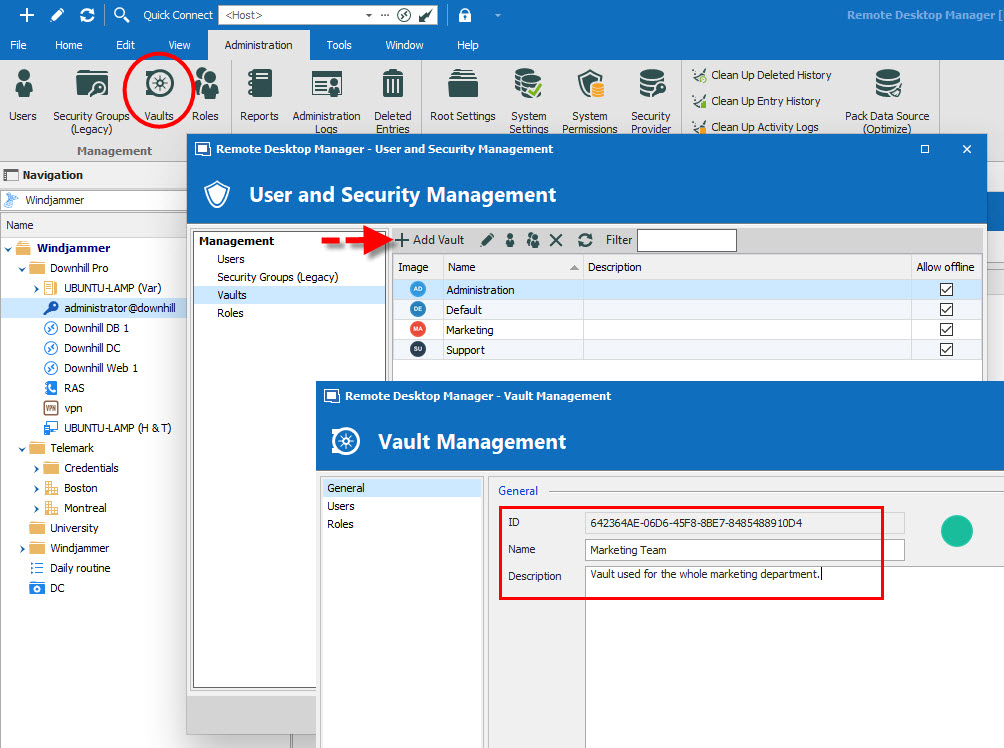
- On the Administration tab, click Vaults, and then click Add Vault.
- Enter a Name and (if you wish) a Description. The ID number is generated automatically by RDM.
Navigating between Vaults
Navigating between Vaults is easy. In the navigation pane, simply use the Vault list to move between Vaults, and then click on the Vault you wish to use.

Moving Entries to a Different Vault
What if you want to move some of your entries from one Vault to another Vault? No problem! Here are the steps:
- Go to the Vault you want to transfer entries from.
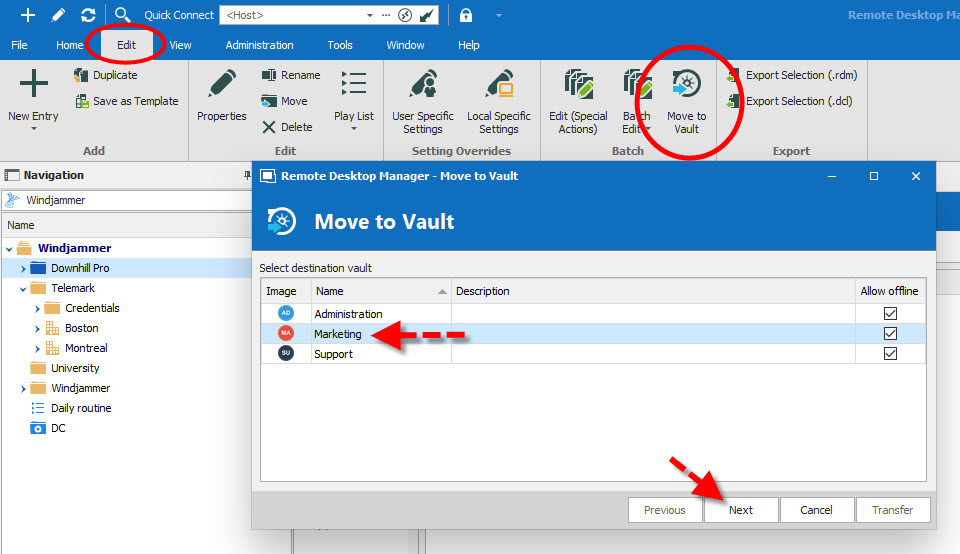
- On the Edit tab, click Move to Vault.
- Select the Vault you want to move your entries to, and then click Next.
- Select the entry/entries that you want to move, and then click Transfer.
And that’s it! Like magic, your entries will head over to the new Vault.
Managing Role-Based Security with Vaults
As mentioned earlier, Vaults simplify user management, because Active Directory groups define who has access to a Vault. These AD groups are known as Roles in Remote Desktop Manager. In general, most Roles have access to a few Vaults, while some groups will only have access to one Vault. Limiting access to Vaults minimizes the need to set permissions on lower-level folders.
To grant Roles access to a Vault, simply follow these steps:
- Go to the Administration tab and click Vaults.
- From the User and Security Management window, click Vaults and then click Assign Roles.
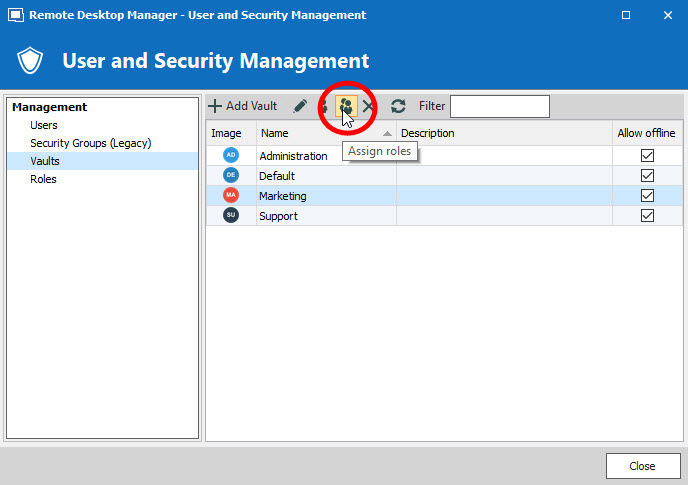
- To choose which Roles have access to the Vault, select the “Is Member” box, and then click Save.
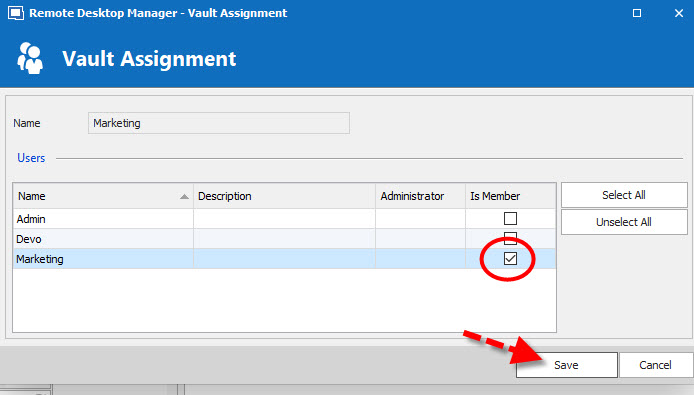
Voila — you’re done! If you wish to learn more about “How to Assign Roles to Vaults in Remote Desktop Manager”, click here to view the tutorial video.
Hopefully, this little class didn’t cause any scary school flashbacks. And yeah, even if things are stressful for you at home, don’t worry — things will get normal in a few weeks (or you’ll just get used to things being abnormal).

