Life can be unpredictable, so it’s nice to know that there are some things you can count on. For example, the sun will rise tomorrow. The earth will spin on its axis. And whenever our amazing community of users sends us questions, we answer them as quickly as possible. Sometimes we even turn our responses into a blog (like this one), because we figure many people may find the information useful.
About RDM’s Export Feature
We recently received some great questions about RDM’s export feature, which lets you import and export data sources and entries, including:
- Export All Entries (.rdm)
- Export All Host List (.csv)
- Export All Entries (.csv)
- Export All Entries (.html)
- Export All Entries (.xml)
- Export All Documents
Plus, you can configure RDM with your preferred data sources, entries and options, and then export the configuration to another RDM instance, or straight to Devolutions Password Server (see below for instructions).
Q&A
Here are some questions and answers about RDM’s export feature:
When exporting one or more folders, is it possible to export everything – including documentation and attached files?
You can export all of the attachments by going to File – Export – Export All Documents. Currently, it is not possible to export specific documents or attachments.
When exporting as HTML, is it possible to include all the information regarding the entry, and not just the General tab page?
Currently, this is not available. However, we have opened an improvement ticket and are working on adding this functionality. Stay tuned!
How can I export all entries in RDM to Devolutions Password Server?
To export all RDM entries to DPS, simply follow these steps (if you wish, you can follow along with the YouTube video tutorial here):
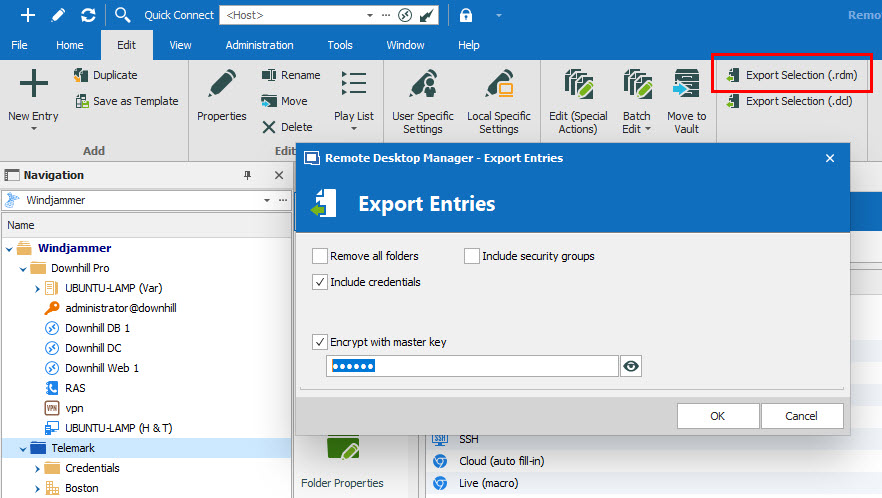
Step 1: In RDM, select the entries or folder you wish to export and then go to the Edit tab, and click on Export Selection (.rdm).
After clicking Export Selection, you can also include your credentials in .rdm export format, and secure your files with a master key. Keep in mind that by default, the credentials are NOT included. Also, specifying a master key will encrypt the entire .rdm file. Make sure you keep this password safe and secure!
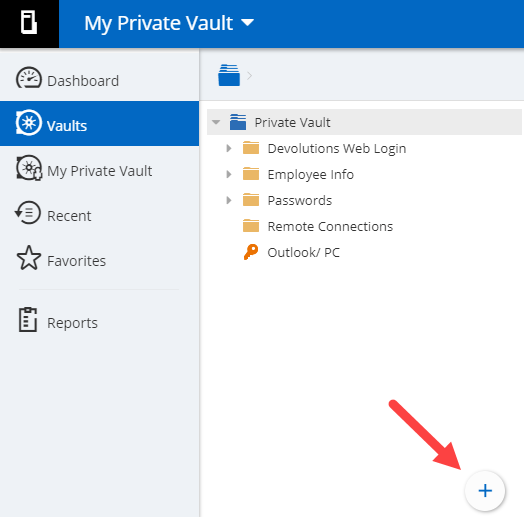
Step 2: In Devolutions Password Server, select the vault (shared or private) that you wish to add your entries too. Once in the vault, click on the + button, and then click on import to open the Import Entries menu.


Step 3: In the Import Entries menu:
- Choose the .rdm file that you’ve previously exported.
- Choose the folder that you want to import to.
- Enter your Master Key.
Click Next and select the entries you want to add (or select “Add” and then “Apply All”).
And that’s it! All your RDM entries are now in DPS.
Send Us Your Questions
If you have any other questions about using RDM’s export feature, please get in touch with us. We’re always listening to you. Go ahead and ask us anything (though we’re a lot better at answering product-related questions than philosophical ones like, “What is the meaning of life?”).
As always, please let us know your thoughts by using the comment feature of the blog. You can also visit our forums to get help and submit feature requests, you can find them here.


