
Hello Devolutions Community!
Today we are going to take a closer look at how to migrate a Remote Desktop Manager SQL Server (including Azure) advanced data source to Devolutions Server.
This tutorial will be particularly useful for those of you who are taking advantage of the re-introduced Devolutions Server free, which now supports up to 10 users through a streamlined licensing process. What’s more, Devolutions Server free does not impose some of the limitations of SQL Server, and offers a stronger security posture.
To make things even easier, we have built a wizard that will migrate everything from SQL Server to Devolutions Server free. And we mean everything, including:
- Vaults and Entries
- Users and Groups
- Permissions
- Attachments
- Documentation
Ready to discover how fast, easy, and — yes — dare we say it? — even FUN it is to migrate your SQL data source to Devolutions Server free? Then let’s get rolling!
By the way, if you would prefer to watch a video of the tutorial hosted by Yann, click play below.
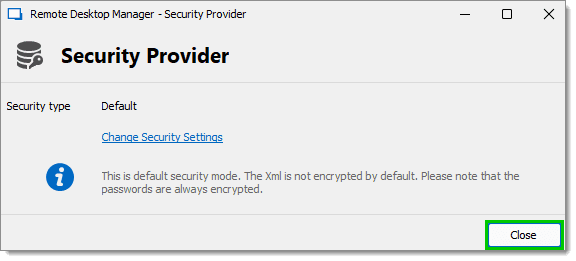
Removing the Security Provider
Please note that before running the migration wizard, you must remove the Remote Desktop Manager Security Provider. Prior to doing this, ensure that all users are disconnected from the data source. We also strongly advise you to create a backup prior to this operation.
Here are the steps to remove the Security Provider:
- Go to the desired Microsoft SQL Server data source.
- Select the Administration tab from the ribbon.
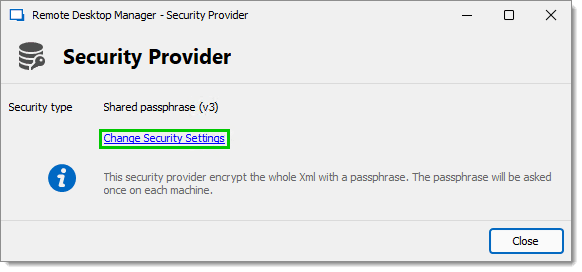
- Click Security Provider.

- Click Change Security Settings.
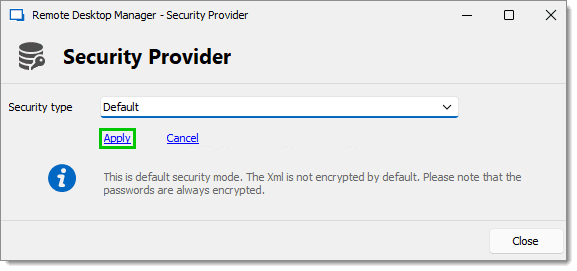
- In the dropdown menu, select Default and click Apply.
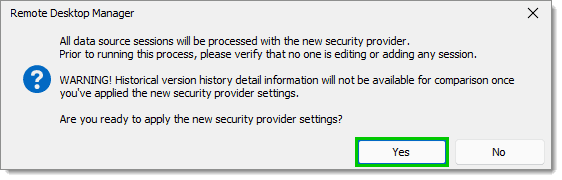
- Click Yes after the warning window appears (this may take additional time for larger databases).
- Click Close.
Congratulations — you are now ready to migrate your SQL data source to Devolutions Server free!
Migration steps
Before we dive into the action, please be aware of the following two important items:
- This operation assumes that you have Devolutions Server Console installed on your target Devolutions Server Console host. You can migrate an MSSQL data source prior to installing an instance of Devolutions Server.
- This operation modifies an existing database, and not a copy. As such, if you need to reverse the process, you must do so from a backup. As mentioned earlier, we strongly advise making a full backup prior to running the migration wizard.
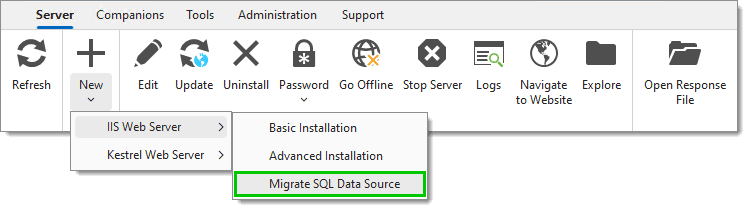
Here are the migration steps:
- Open the Devolutions Server Console by navigating to: Server – New – IIS Web Server – Migrate SQL Data Source.
- Enter the applicable information in the Database and Credentials sections.
- Enable Activate Encryption At Rest. This will generate a new encryption.config file and re-encrypt the data via the newly created key.
- Click on Test Connection.
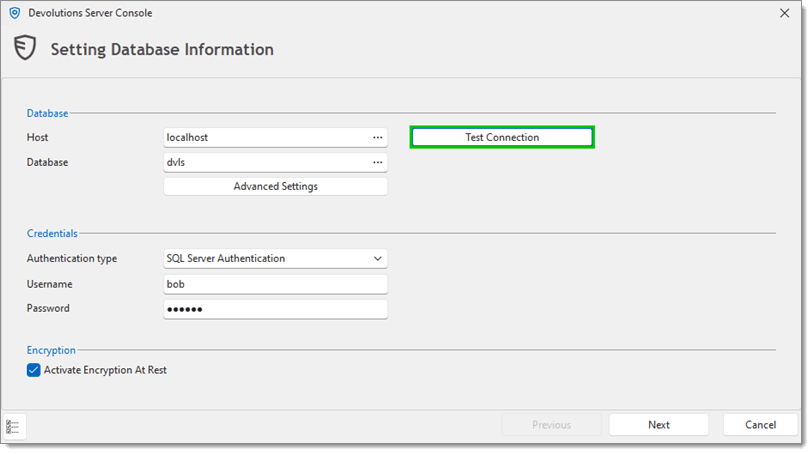
- Click OK.
Please note: The “Database contains encrypted data” warning is specific to Devolutions Server encryption keys, and not default Remote Desktop Manager data encryption.
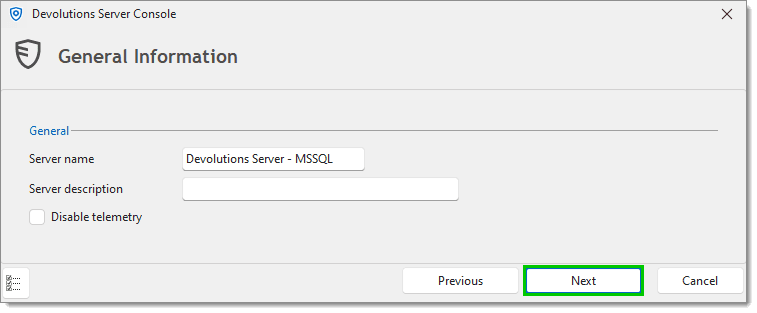
- Enter the Server name and click Next.
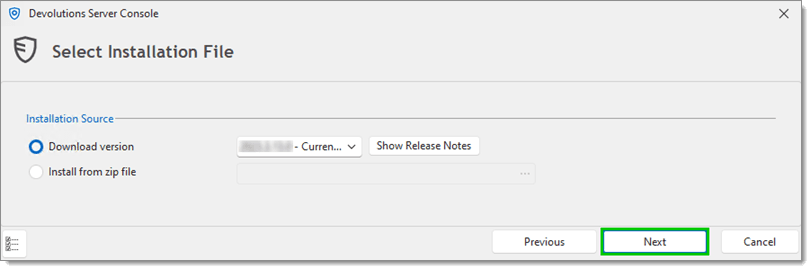
- Choose which version of Devolutions Server to download and click Next.
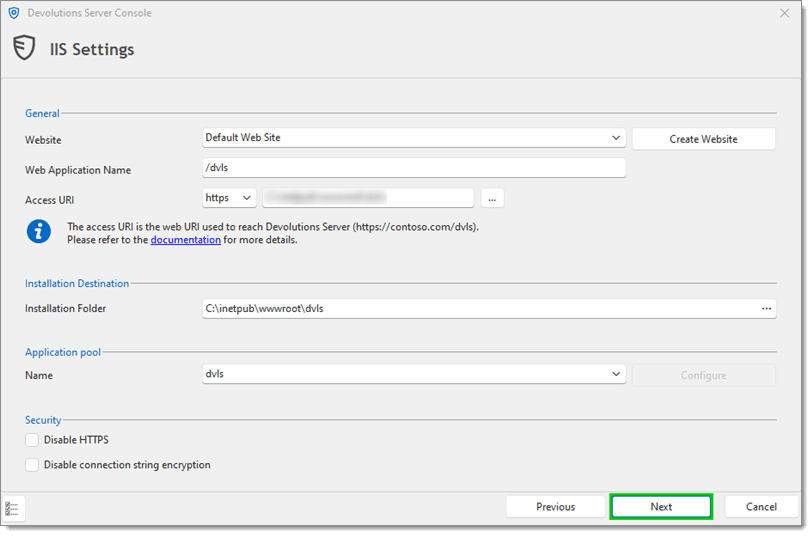
- Input the IIS Settings for the new Devolutions Server installation.
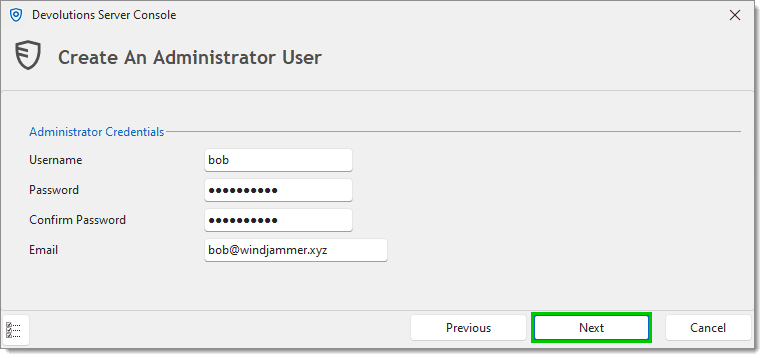
- Enter the information for the new Administrator User.
- Install the Scheduler Service (if this is the first instance of Devolutions Server Console).
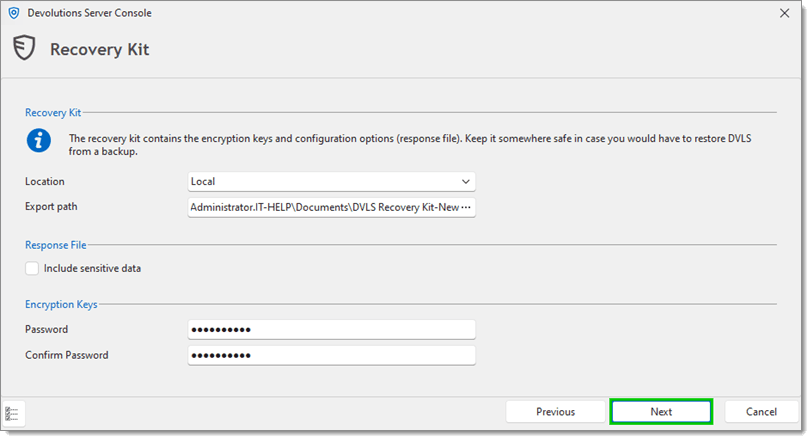
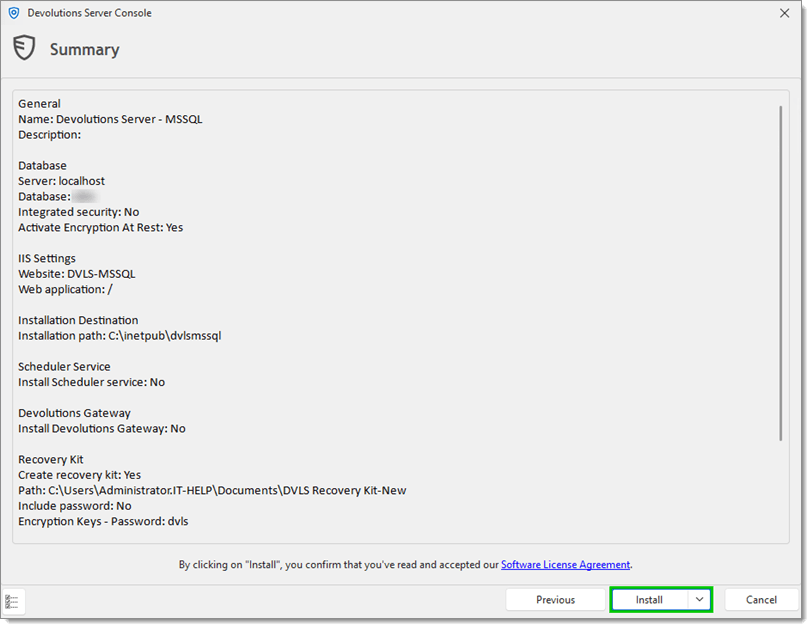
- Configure the Recovery Kit and click Next.
- Click Install.
And that’s it! Once the process is complete, the new Devolutions Server installation will be available for use immediately. Simply add a new data source for your Remote Desktop Manager clients to connect to the Devolutions Server data source (click here for guidance on this process).
Need help? Just ask!
We have aimed to make the SQL Server -> Devolutions Server free migration as easy as possible. However, if you have any issues or questions along the way, then we are here to help! Simply contact our Support Team. You can also follow any changes related to this documentation directly on our online help right here.
Share your experience
We also invite you to let us know about your overall experience with Devolutions Server free. Increasing the number of licensed users from three to 10 is part of our longstanding commitment to supporting small and mid-sized businesses (SMBs), which need robust security, but don't have enterprise-level budgets and resources. We are on your team and in this together!