These days, using just one monitor doesn’t cut it anymore with Zoom meetings, chat apps, and SO MANY BROWSER TABS OPEN ALL THE TIME (honestly, it’s really out of control).
Well, we have some good news for those of you who want more visual real estate: when using Remote Desktop Manager, you can easily display multiple remote screens from an RDP session. The only requirement is that you need to have the same number of local monitors as remote monitors (e.g., if you have one local monitor, and there are two remote monitors, then you will only see the primary screen of the remote monitor).
Here are the simple steps to enable this feature:
-
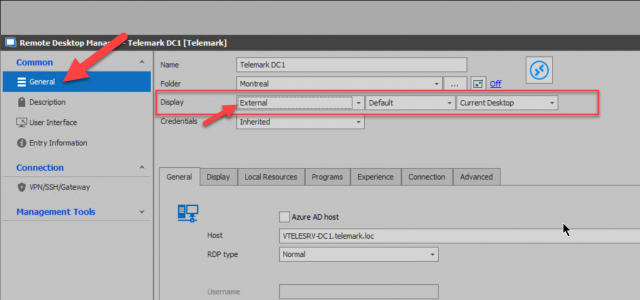
Launch RDM, right click on an RDP entry, and then click Properties.
-
Select the General side menu and change the local Display to **External **(the multiple monitor display is only available in External display mode).
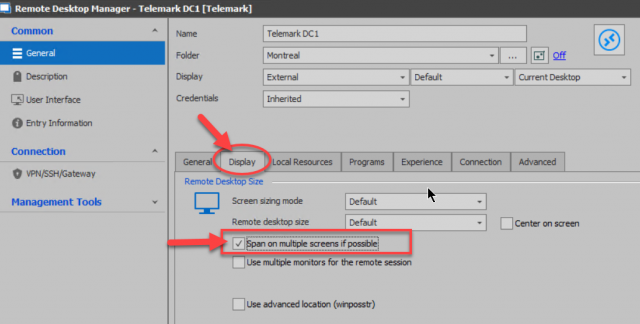
- Select the Display section (from the menu tabs) and enable the option Span on multiple screens if possible.
Using Multiple Monitors for a Remote Session
If you wish to use multiple monitors for a remote session, then you’ll need to set your display ID. This is necessary because the Windows screen display ID is not necessarily the same as the RDP. In addition, RDP monitors ID start with 0 and not with 1.
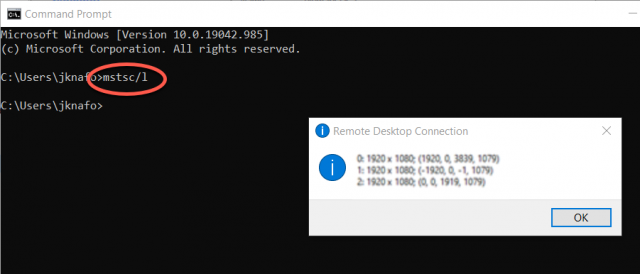
- To discover your RDP screen settings, simply use the command mstsc/l
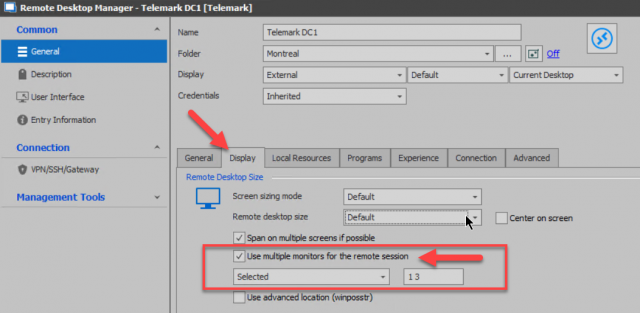
- In the remote Display section of your RDP session, enable the Use multiple monitors for the remote session option, and then choose All or Selected.
Note that if you choose Selected, then you can use a space or a comma between the monitors to identify them. This will display your remote host on the monitor specified in the field. The remote host will only display and span from the first local monitor selected.
Local Monitor and Desktop Selection
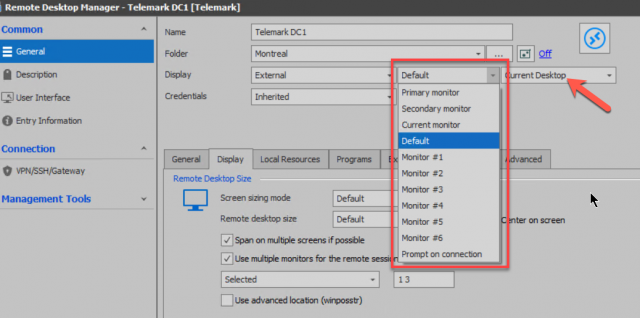
In External display mode, you can also select which local monitor you want the session to display. This option is available in the first drop-down menu.
The second drop-down menu should always be set to Current Desktop, unless you wish to display on a local virtual desktop.
And there you go! You’re all set to see everything on every screen, just like Big Brother! We hope that you find this feature helpful. Please share your feedback by commenting below, or by posting in our forum.