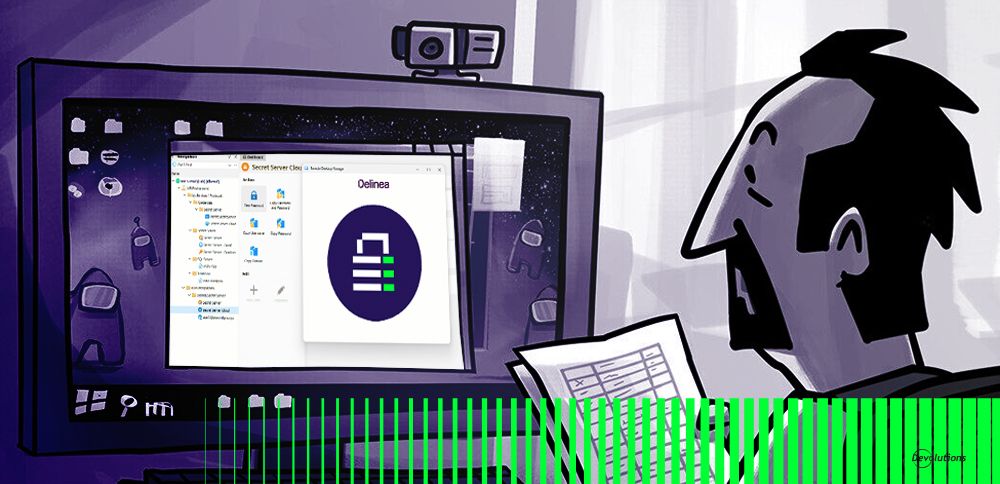
During the last few months, you may have noticed a heightened level of collaboration between Devolutions and CyberArk. In Remote Desktop Manager (RDM) 2020.2, we refreshed two out of three CyberArk entry types in order to take advantage of their improved API. Today, I’m happy to announce that the third entry type has been refreshed in RDM 2020.3. This completes the current round of improvements, and essentially allows organizations to go passwordless for their day-to-day workflows.
Implementing AAM
To create a passwordless system, the only requirement is that you must implement CyberArk's Application Access Manager (AAM) as part of your organization’s CyberArk deployment. This module allows for Private Key (PK) authentication, which means that the whole Identification/Authentication phase is managed by your IT Department — thus rendering passwords completely unnecessary.
System Overview
Once you have implemented CyberArk’s AAM, you will need to authenticate to RDM, regardless of which data source you are using. The following diagram illustrates this system:
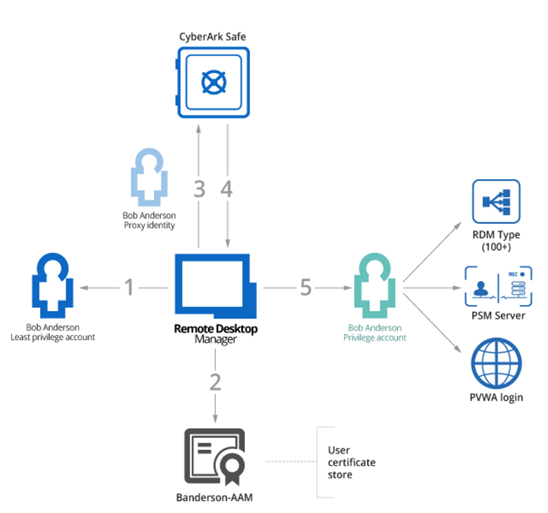
- The user is authenticated to RDM with a Least Privilege Account. This gives the user a view into RDM content as per the permissions set in Role-Based Access Control.
- When a Privileged Account is required to launch a supported technology, RDM obtains the appropriate PK from the workstation (the PK must be held in the certificate store for the user).
- The PK is used to authenticate against the CyberArk Vault. It is configured as an “Application” object, which is essentially a user proxy used to query the Vault.
- RDM obtains the details of a Privileged Account. This means the user does not even know the password to their own privileged account!
- RDM uses the Privileged Account to launch a PSM Connection, connect to the PVWA, or launch a session supported by RDM. While all of this is happening, the password remains hidden from the user.
CyberArk Application Access Manager (AAM) Configuration
The first step in configuring the AAM is that you must issue a PK for each of your users, and then deploy them to their workstations. Obviously, the best source for understanding this process is the CyberArk documentation. However, we have included basic instructions in our integration guide. As for the RDM side, again we support different methods of managing the PK:
- PK information stored as an entry which exists in the user’s private vault. This is surely the simplest method, as you have a one-to-one relationship between users/keys/accounts. However, it must be done by the users themselves.
- PK information stored in “My account settings.” This method allows administrators to create AAM entries within RDM, while each user sets their own PK details in their personal settings. Since the account lookup uses keywords specified in the AAM entry, it means that you have two options:
A. Handled in CyberArk: For each user, there needs to be a single Privileged Account that is accessible from the same keywords. The burden is on the administrator to isolate these in various safes, and to ensure that everyone’s account has the same keywords.
B. Handled in RDM: To find their Privileged Account, administrators must create a unique AAM entry per user with the keywords. RDM’s Role-Based Access Control must be used to ensure that users can view and use only appropriate entries.
As always with RDM, you can mix and match approaches depending on your own requirements.
CyberArk Privileged Session Manager (PSM) Configuration
A discussion on the PSM is surely too broad to fit in this blog, so I will again refer to CyberArk’s documentation. As for RDM, in your PSM-Server entry, you can use one of our mechanisms to have the connection use the AAM entry configured in the previous step.
If you have chosen AAM option #1 above, then you must use the User Specific Settings in RDM to create the link between the PSM-Server entry and the AAM Entry that is stored in the User Vault.
If, on the other hand, you have chosen options #2a or #2b, my opinion is that the best option is to set the PSM-Server entry to use “Credential Repository,” paired with “prompt on connection.” This makes the experience better for new users, and experienced users will know how to switch to User Specific Settings to make their choice permanent.
CyberArk Webservices SDK Configuration
This allows your organization to grab certain passwords whenever the PSM (or RDM’s account brokering) is not an option, while still ensuring that access is only available from a Privileged Account that the user does not control.
When you stay within the confines of your CyberArk ecosystem, you typically do not need to use this option. However, in RDM 2020.3, we have made it available in case your organization wishes to implement it.
Conclusion
For more detailed information, here is the official documentation for each of our integrations, as well as a few links to our own documentation on features mentioned in this post.
1. Integration guides (download link from our CDN)
2. RDM Help
As always, please contact our support team at ticket@devolutions.net if you’d like a walk-through or if you need any clarification. I also invite you to comment below with any questions or feedback.