As Devolutions’ Product Marketing Specialist my role consist in staying up-to-date with the latest updates made to our software to create weekly technical blogs and tutorial videos to keep our clients informed. I am also in charge of the creation and overall successful organization of marketing events and trade-shows. I’ve worked in a corporate environment for a long time and it is a joy to be back to my roots and working again in the IT world.
Remote Desktop Manager is like having your very own personal concierge. In addition to managing and securing all of your remote connections, you can automatically configure a VPN for multiple sessions at a remote location. This saves a lot of time and eliminates the possibility of manual data entry errors.
Getting Started
The first thing you need to do is create your VPN entry and your remote session entries, and then place them in the same folder. If you need additional guidance on VPN entries, please check out this article.
Configure the VPN Settings on the Folder Entry
Once you’ve created your VPN entry and remote session entries, simply follow these steps:
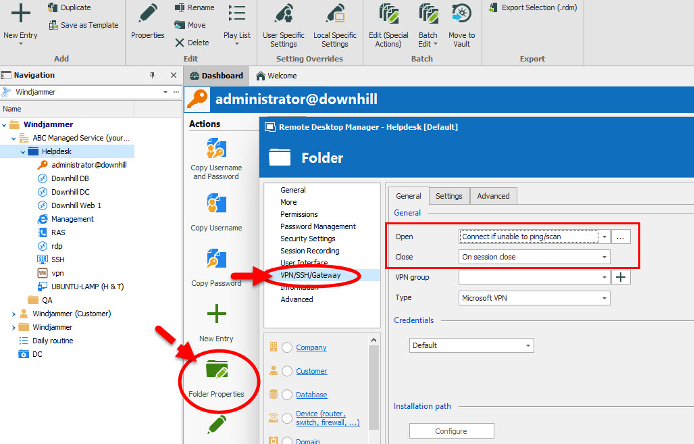
Select your folder, open the Folder Properties, and then select the VPN/SSH/Gateway side menu.
In the Open list, choose how you’d like the VPN to open when you launch a remote session. We recommend choosing Connect if unable to ping/scan. In the Close list, choose how you’d like the VPN to close at the end of a remote session. We recommend choosing On session close.
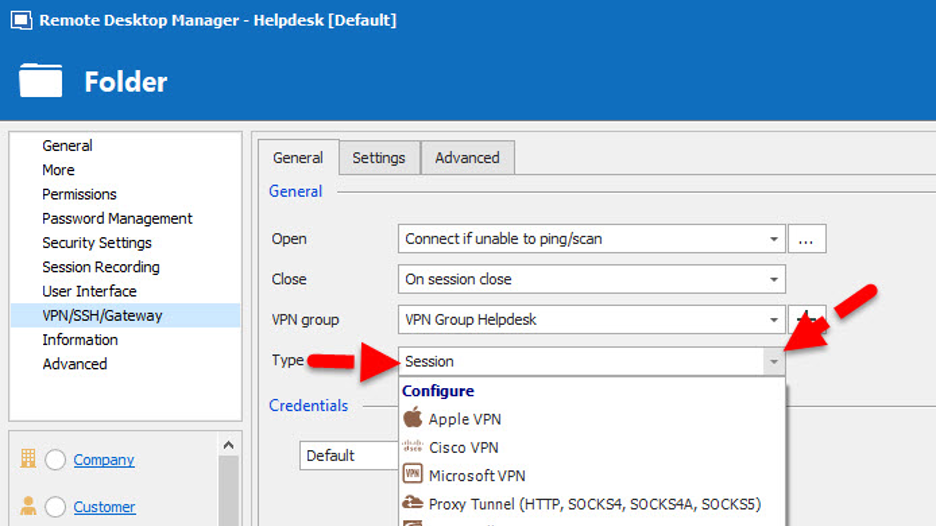
In the VPN group section, click on the plus sign (+) and enter a name for your new VPN group. This will ensure that the VPN only closes when the last session in the VPN group is closed. You’ll need to do the same for each of your entries, so that they’ll all be part of the same VPN group.
In the Type list, click Session.
Click the Settings tab, click on the Session dropdown menu, and then select the VPN entry that you created.
Perform a Batch Edit to Configure the Session Entries
You’re almost done! Now that you’ve configured the VPN Settings on your Folder Entry, it’s time to configure your session entries. Here are the steps:
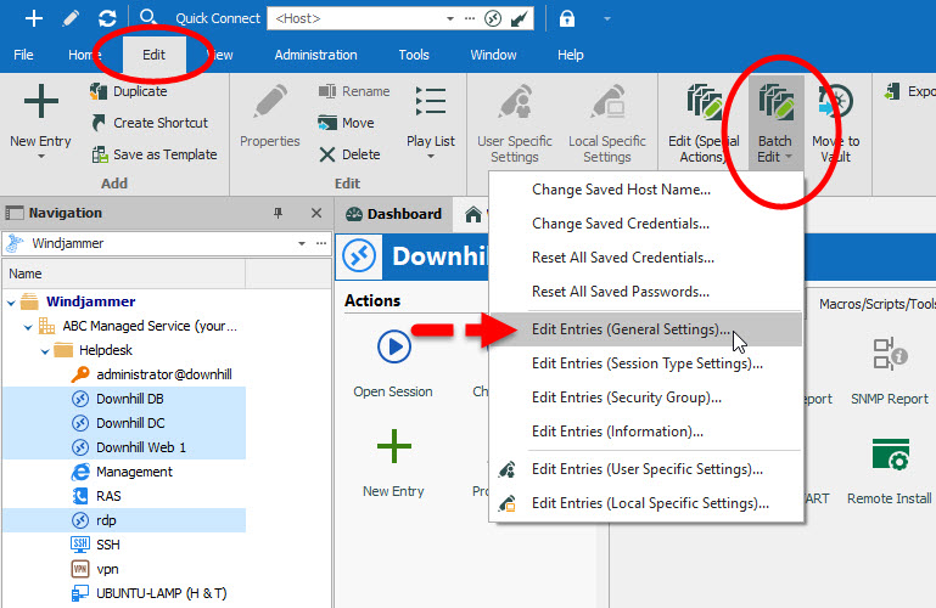
Select the session entries that you want to configure in your folder. Then in the Edit ribbon, click on Batch Edit and select Edit Entries (General Settings). Please note that Batch Edit is also available in the right-click context menu.
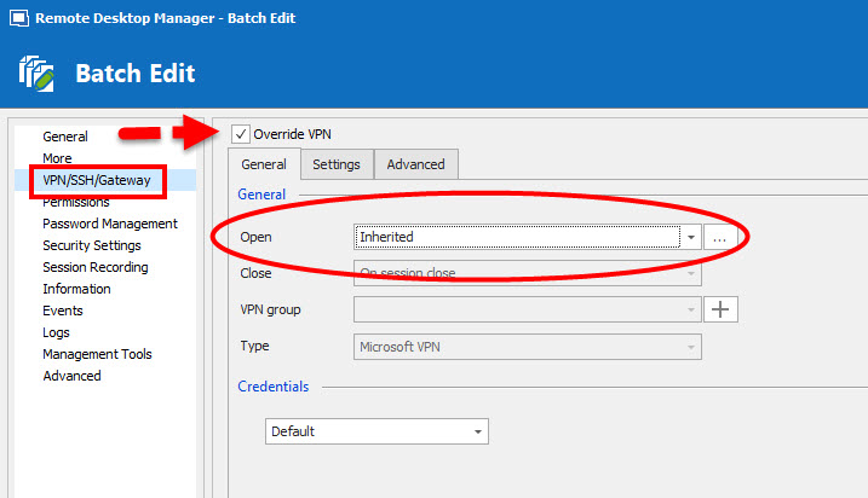
In the VPN/SSH/Gateway menu, select the Override VPN tab. Then select Inherited in the Open field. This will automatically set all the General options of your selected entries to Inherited.
Woo hoo! And now you are 100% done and ready to let the RDM do the work of configuring a VPN for multiple sessions. Just sit down, click, and enjoy the show! I hope this saves you time and makes your life easier.
As always, please let us know your thoughts by using the comment feature of the blog. You can also visit our forums to get help and submit feature requests, you can find them here.
Devolutions Hub is a secure cloud-based IT credential manager that pairs well with Remote Desktop Manager to create the ideal solution for managing credentials.
At Devolutions, we’ve prioritized security since day one. In this spirit, we’re here to answer some of the most frequently asked questions concerning our security policies and practices.